Saturday 31 August 2013

Tom Yam Gung - some experiments......Recipe 1 (Simple)

I am a great lover of this stuff - the combination of lime, fish sauce, chilli heat, and big juicy prawns (although you can of course put whatever protein you like in - or even keep it veggie by adding mange tout, baby sweetcorn etc etc)

There must be thousands of receipes for Tom Yam, and I am going to embark on some tests to find out which ones I like best.

You can seemingly make these as complex or simple as you like......I shall start with simple and move on from there!

Ingredients

For the paste:
4 garlic cloves
1 fat lemon grass stalk (or a pack of the ones from UK supermarket chains!)
1" piece galangal (or same root ginger)
Bunch of coriander - stems only (and roots if you have them on as well)
Chillies - birds eye - x3
2 shallots
Good splash lime juice (or juice from 2 limes)
1 tbsp palm sugar
1 tsp shrimp paste - try and get this from Thai supermarkets in the smallest sized volumes so you reduce wastage - it will keep in the fridge (seal the pot in a baggie as well!) for a while...

For the rest:
1.5L good chicken or vegetable stock. The Kallo organic stock cubes are good if used as directed: i.e. 1 cube per 500ml
Another fat lemon grass stalk (see above) very finely chopped
Chillies - birds eye - x2 or even 3 finely chopped
4cm piece root ginger, sliced into batons 1mm x 1mm
Fish Sauce (nam pla) - 3-4 tbsp plus to taste
Lime juice - 2-3 limes plus to taste
1tbsp palm sugar
Mushrooms - oyster if you can get them, otherwise a nice variety - mixed wild mushrooms are great - I used some foriesterre and some funky thai mushrooms
Prawns - big ones. lots. I like a good 8 per person - raw, peeled and defrosted if frozen
Bamboo shoots - these are great in the soup. I get these packaged simply from the thai supermarket, but they are available in mainstream supermarkets, although often jarred in oil - be sure to rinse them off
Spring Onions - 5 or 6, finely chopped
Coriander (the leafy bits left over from your paste), chopped roughly. Reserve a small sprinkle for serving

Method
First to make the paste.
Combine all the paste ingredients in a food processor and blend to a rough paste
Heat a saucepan and add paste. Stir around to ensure it doesn't stick, then add the stock.
Bring to the boil, then reduce to a simmer for 10 mins or so
Remove from heat, and then sieve into a bowl. Discard paste, rinse pan and return your stock to it.
Place back on heat and bring to a boil again. Skim off any froth and impurities from the top then reduce to simmer
Add the lemongrass, chilli, ginger, nam pla, lime juice and sugar and stir well
After about 2 mins, taste, and adjust nam pla, lime juice and sugar accordingly
Add the mushrooms (and any other veg if you aren't making this with prawns!)
Add the bamboo shoots
Finally, add the prawns. (and tomatoes - optional)
Once the prawns just start to turn pink, add the spring onions and most of the chopped coriander leaves.
Very fast, do a final taste, adjust lime, nam pla or sugar as required and serve, with a sprinkle of the reserved chopped coriander on top.

Enjoy!


At last.....the masala dabba!

After a wait of what seemed like a month but was actually only 4 days, my masala dabba has finally arrived!
When you are seriously into Indian cuisine, unless you start with unloading the entire spice cupboard/ drawer etc and selecting everything you might be requiring, then you are going to need one of these for your most used spices. Indeed, its not uncommon to have 2 of these - perhaps one for powdered and one for whole spices - but in this case I am good with just the one.
I've gone with the large - 24cm/ 9.5" diameter stainless steel model and purchased it from www.redhotcurry.com after some careful research, and for a snip at £18. You can get them prefilled with spices already but I would recommend you (a) decide yourself what you would like in them, and (b), grind them yourself.
Similarly, many come with pre laser etched labels on the pots - unless you are convinced that is exactly what you want in your masala dabba then this would irritate me!
Many models come with transparent lids. I cannot see the point - you want your spices in airtight and light-tight storage - and when you come to need them, your lids will be off anyway - thats the point of the thing!
Don't go overboard: whilst this model has a pretty much airtight outer lid (there are two), you still only really want to be grinding up only what you will get through in, say a month.

So, to fill it. This of course is mainly a matter of personal taste and will largely depend on what you cook regularly and therefore what spices you need - although there are a couple of "rules"...
  • No corrosive stuff! battery acid is pretty obvious, but also think salt, bicarbonate of soda (you don't have to use these things for spices of course!), and citric acid
  • You don't want anything really pungent - like asafoetida for example - or spices where you want to keep the aroma as fresh as possible - such as cardamom seeds which you want to keep really airtight
  • No dessicants - almond powder, dessicated coconut, silica packets you get in shoe boxes etc!
  • Finally, no oily seeds such as sesame
Other than that, the World is your oyster.
What have I put in mine then.....


Clockwise from the 12 o'clock......Whole Cumin seeds; Dhania Jeera (see below); Turmeric powder; Mustard seeds; Garam Masala; Ground Coriander; and in the middle currently resides Extra hot crushed dried chillies (Still thinking about the middle one)

Dhania Jeera
As the name implies, this at its simplest is a blend of ground coriander and ground cumin and I use it quite a bit (look carefully at your recipes - frequently they will separate the two out in the ingredients list but in the method you will see they often go in together)
That said, I have yet to see any ingredients lists for dhania jeera that didn't manage to fit a few more spices into the mix - likewise the balance of coriander to cumin seeds is highly varied!
Some "recipes" for this can include all sorts of things like Indian Bayleaf, fenugreek seeds, mace, nutmeg, cinnamon, chilli, cloves, cardamom and poppy seeds......but I have gone with a simpler route, based on some commonalities across them all which I found:-

3tbsp coriander seeds, 1 1/2 tbsp cumin seeds, 1/2 tbsp black peppercorns, 2 cloves, 6cm piece of cinnamon and 1 dried mild kashmiri chilli.

Usual methodology applies - dry pan, roast them all off for a couple of minutes and then allow to cool completely. Grind up in the mortar in small batches to ensure a fine powder and you are in business!


Wednesday 28 August 2013

Very Very fast Dover Sole......Quite delicious!

Well, My Rick Stein India book has arrived and I must say it doesn't disappoint! (I wasn't expecting it to of course, having watched the series)

Flipping idly through the pages, and at home alone with nobody else to cook for, I came upon a dish that yelled out to be made. (only my son eats fish/ seafood - daughter and wife have defective taste bud somewhere and refuse to partake.....)

The title might be a bit strange - but it says everything it needs to......Fish Fry with Garlic, Cumin and Kashmiri chilli.........whats not to like! :-) My runner bean plants are now in full flow so grabbed a nice handful to go with the fish, and decided not to bother with rice/ bread or potatoes.

This recipe is brilliantly fast - not even a masala to make this time - just 10 mins of brief marinating which is about perfect for sorting out what you are to have on the side.

Ingredients:
  • Some fish! Rick recommends dabs, John Dory, plaice, flounder or lemon sole - and circa 250g-300g apiece. I had none of the above but happily had a couple of large Dover Sole available. (I should point out that I was going to make a classic beurre blanc with capers and new potatoes to go with this but got distracted by this recipe instead!)
  • Oil - recommended Coconut oil - didn't have any of that but rape seed/ vegetable/ sunflower does the job - 50ml
  • The marinade:
    • 4 cloves garlic, pulped - I used the Garlic twist on this occasion
    • About 6 of my 2cmx4cmx2mm frozen slices of root ginger - again, pulped
    • 2 tsp cornflour
    • 1/2 teaspoon gound turmeric
    • 1 tsp ground black peppercorns
    • 1 tsp ground cumin
    • 1 tsp salt
    • Chilli......you have some options here - but you don't want to lose the fabulous fish. You don't want anything seriously powerful - I used my dried mild kashmiri chillies and ground them up into powder, but a mild chilli powder will do. I did read somewhere that if you don't have kashmiri chilli powder, simply use 2/3rds ordinary chilli powder with 1/3rd Paprika (NOT the smoked Paprika) and you will be alright. I haven't tried this, simply because I do have Kasmiri chillies, but in the interests of being thorough, I will give this a go at some point and let you know what I think.
    • Finally, the juice of a nice small lemon.
  • Mix this all up into a paste. Lightly score your fish on both sides and rub the marinade into both sides.
  • Leave for a while - Rick says 10 mins should suffice. I left it 20 due to a phone call.  It isn't an overnight job though!
  • Oil - medium heat. Fry fish for 4 mins each side. I put about 15g unsalted butter in for the second 4 mins and did a couple of bastes. NOTE the 4 mins.....for the two fish like this I had it was perfect. I also removed straight away from pan after the second 4 mins and placed on warmed plate rather than leave it in the pan whilst sorting out the rest of the meal. (rest of meal just quickly - cut fresh runner beans, put in salted boiling water for 1 minute then refreshed in cold water and drained. Last 4 mins of fish - sauted the beans briefly in a little unsalted butter, good pinch freshly ground black pepper and a good grating of nutmeg with the microplaner. (I find it almost impossible not to add a little nutmeg to fresh green vegetables these days......particularly savoy cabbage.....)
  • That's it! Serve with whatever you like, but make sure you have some citrus on hand to squeeze over.
This dish is absolutely fabulous. Simplicity itself and fabulous. (did I mention fabulous?) The fish was beautifully succulent, the spicing quite obvious but not enough to interfere with the taste of the fish either.
Everyone should make it immediately! Great stuff Mr Stein!

bon appetit


(Yes, both fish for me thanks!)

Sunday 25 August 2013

Phudino Dai - Yoghurt Mint dip!

Think this is worthy of a post by itself.
It takes seconds and is fabulous!

You will need -
Yoghurt: again, using the natural organic full fat Yeo stuff
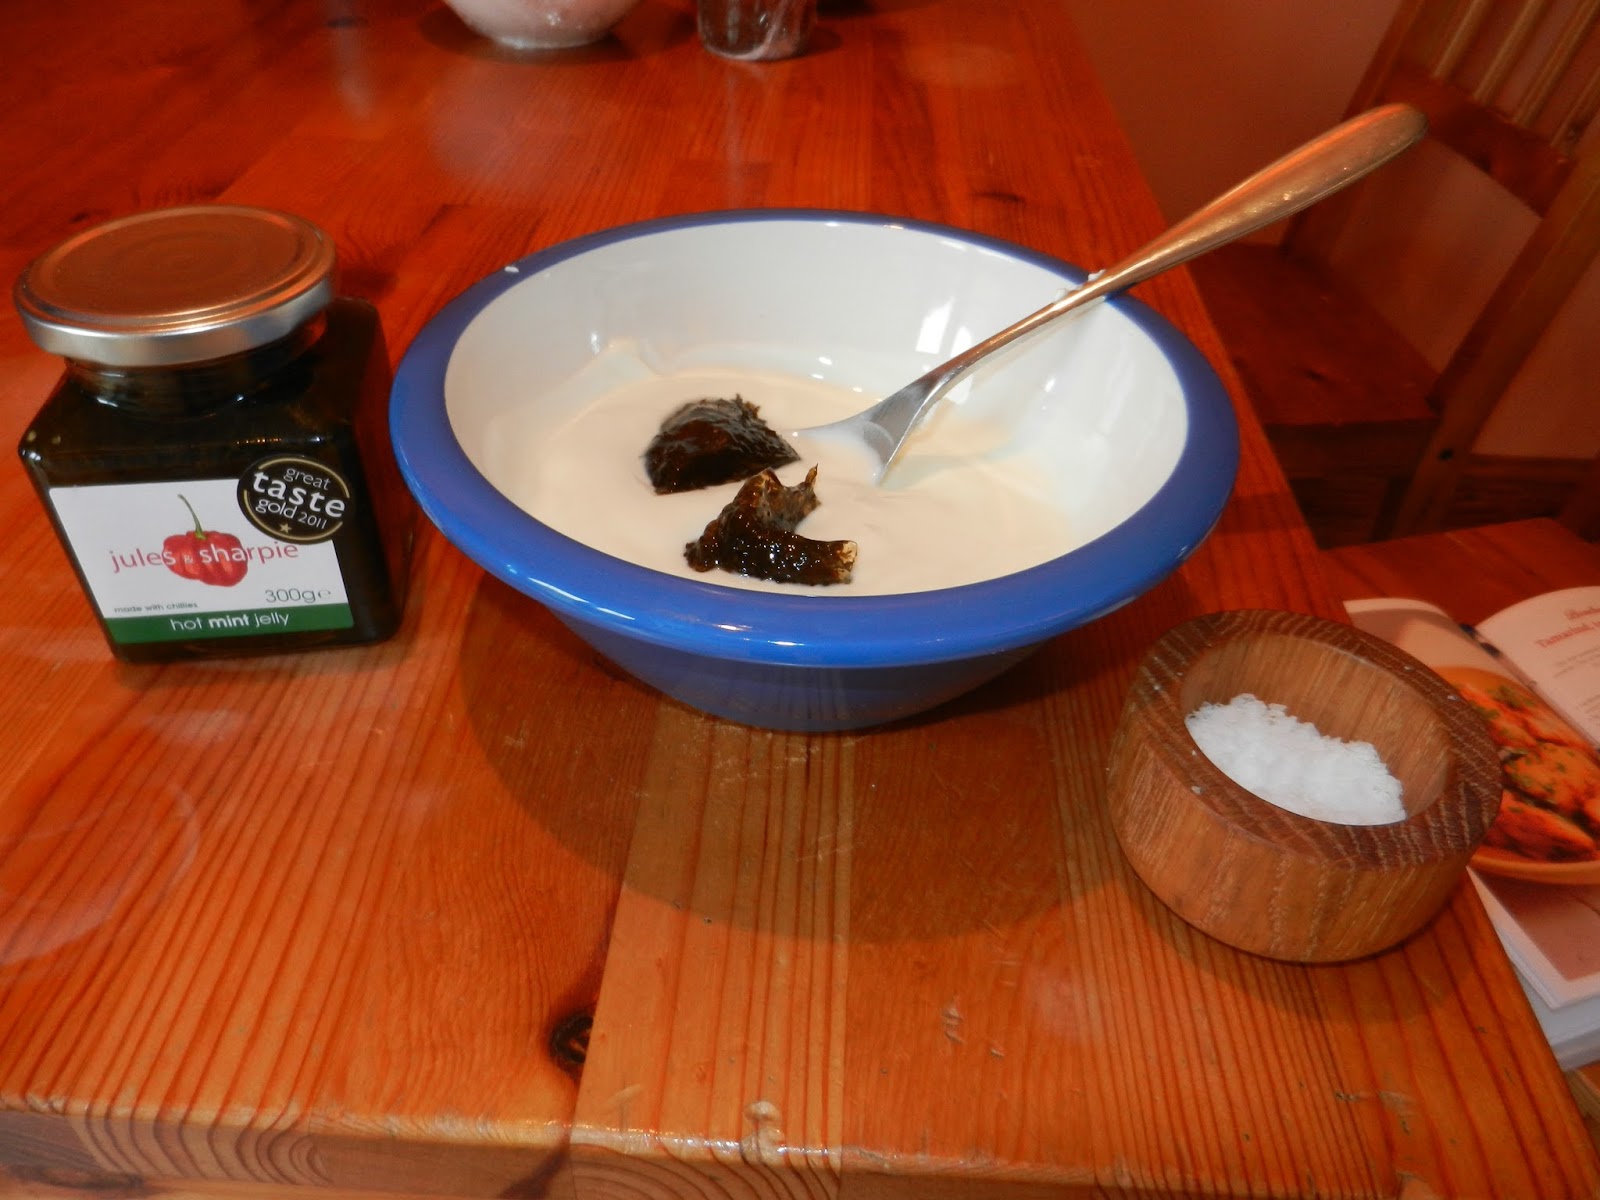
A rather special mint jelly from Jules & Sharpie - Hot Mint Jelly - this is available online and is perfect for this sauce!
A little salt

In a bowl, put about 5 tablespoons yoghut, followed by 3 heaped teaspoons of the hot mint jelly. Mix well, trying not to eat too much as you taste. Add salt as required.

Chill. Serve.


A mini banquet - Part 4

So the the final part - here we will finish up the Sukhu bataka, the chicken "tikka", the Lila dhania baath and Phudino dai.

1. Its a messy job, and there are a couple of ways of doing this......but we need to cook and char the chicken. Start with threading the chicken onto the metal skewers (if using wooden ones, do remember to soak them for 30 mins in cold water before using - including weighing them down in the water so they aren't floating on the top!). You can do the chicken on a BBQ - preferably gas for temparature control - or rest the skewers across a grill pan with foil underneath and do under your grill. - either way, keep a good eye on them - you want a nice char on the chicken but it must be kept moist and just cooked too! I usually put one of the largest pieces of chicken at one end of a skewer so I can take it off and check the cooking without disturbing the rest of the pieces. Get the chicken cooked will, transfer to dish and off to the warming oven it goes!

2. Sukhu bataka - get the mise en place in hand -
  • The 'ol bowl of pre-prepared masala!
  • The rest of your potatoes - or a new batch if just doing this dish
  • 1 1/2 tsp brown mustard seeds
  • asafoetida
  • salt, turmeric
  • ground coriander, ground cumin
  • fresh coriander
Again, this is really fast. Back with the heavy pan, 100ml sunflower oil into the pan and heat on high for 1 min. Reduce to medium heat, add mustard seeds and wait until they start to pop. When they do, reduce heat to low whilst carefully stirring in the potatoes and asafoetida. Add about 1tsp salt and the same of ground turmeric and stir in to coat all the potatoes - then bump the heat back up again to high, cover and cook for 2 mins, shaking the pan every so often to ensure the potatoes aren't sticking. Stir in another good tablespoon of the fabulous masala, along with about 1 tbsp ground coriander and 1 tsp ground cumin - cover the pan, reduce heat to minimum (moving to another ring if necessary) and cook for 2-3 mins - longer if your potatoes weren't fully cooked in the first place. Sprinkle with your chopped coriander and serve, or off it goes to the warming oven!

3. Time for excitement - it's the home stretch! - Lila Dhania Baath
I don't think I will ever make any other type of rice. If you achieve the same results I have with this recipe from Prashad, then perhaps you will feel the same way!! It works hot, warm and cold.
Get the (very small this time) mise en place in hand.....

  • 350g Basmati rice - I like Tesco Finest at the moment - rinsed through in warm water about 5 times and drained.
  • 50ml Sunflower oil
  • 1 tsp cumin seeds
  • 1 tsp salt
  • The final tablespoon or so of your fabulous masala.....BUT.....you need to put it back in the mortar, add about 3 handfuls of fresh coriander and pound that into the existing masala to blend
Take reasonable sized saucepan, in goes the oil on medium - high heat for 1 minute and pop in the cumin seeds. Watch  them - when they start to turn brown, go in with the rice, masala, salt and a litre of boiling water.
Keep the heat as is, and boil uncovered for 8 minutes, stirring through every so often.
Now - you might want some gloves for this bit......take a piece of kitchen foil, put over the rice and scrunch down on top of it, tucking in as you go. Reduce heat to low, put the lid on the pan also and continue to cook for another 8 mins.
Remove from heat and leave to rest, covered, for another 5 or so mins.
Remove lid and foil, and run a fork or spoon through the rice to loosen them up.
Serve straight away (although as said before, it's ok warm and cold!)


So Here we have it........tuck in and enjoy!!!!!
Quick post separately on the Phudino dai (Yoghurt and mint dip)

A mini banquet - Part 3

Onwards to part 3 - Bombay bataka (Prashad/ Kaushy Patel)

This is mental! The sourness of the tamarind and acidic tomatoes balances perfectly with the sugar and spices to create a multi-layed flavour sensation!
I confess to departing from the recipe with this one - more as a result of laziness than anything else - but having not had the original yet, I'm not disappointed! I'll get around to making the exact recipe shortly and will let you know whether the short cuts are worth it or not!

Again - lets get the mise en place sorted out. (I'm assuming you have cleared down after part 2 by the way - if not I suggest you stop and rethink your approach!  - and clear down - and then you will be ready to start)

You will require:
  • The bowl of masala paste (the first of the recipe departures - Should have made some pulped root ginger but decided to use my pre made masala instead. Seemed to work well)
  • The glass of tamarind water
  • A pile of boiled potatoes! (Here another of the laziness pieces - I've been using Exquisa potatoes, new potatoes, Red Roosters etc and I pre-cut them into approximate 2-3cm cubed pieces - pretty roughly at that - with skins still on, and boil in salted water until a knife slides easily in - then drain and set aside. (I made enough for both bataka dishes))
  • Some dried chillies - I've used a couple of pre-dried very hot Thai chillies and 2 Kashmiri dried chillies, all ripped in half. Add in the same bowl 2tsp Cumin seeds and 2tsp brown mustard seeds
  • 2 tins of peeled plum tomatoes
  • 50g Sugar - receipe calls for Jaggery, which I don't have. I've used cane sugar which comes in a solid block and grates using a coarse cheese grater easily. You could equally well use soft brown sugar
  • Asafoetida, Salt, ground coriander, turmeric
  • Handful fresh coriander
  • 1 1/2 teaspoons garam masala

    Step 1 - 130ml Sunflower oil into a heavy based saute pan on medium heat for a minute. Add the dried chillies, cumin and mustard seeds.


    Step 2 - when the mustard seeds start to pop, lower the heat and stir in the tomatoes and asafoetida. Note - like the last dish - tip the tomatoes in away from you, wearing gloves if you like! Then stir in the sugar and heat until disolved.
    Step 3 - increase heat, stir in tamarind water, a good desert spoon of the masala paste, ground coriander, turmeric, salt, half the chopped fresh coriander and half a litre of boiling water. With the heat remaining on high, cover and cook for 10 mins.


    Step 4 - Add the garam masala and stir well before adding in the potatoes carefully so as not to break them up. Take the pan off the heat, sprinkle with the remaining coriander, cover and leave to rest for at least 10 mins if consuming immediately, or 10 mins, then shift to warming oven/ reheat on hob.
And that's it - you are done with this one - enjoy!

Onto the final part........

A mini banquet - Part 2

So - onwards to part 2 - we've done our prep the day before and are now ready to assemble like avengers.

to remind you of the menu, here it is again..

Lila dhania baath - Green Coriander Rice
Sukhu bataka - Spicy Picnic Potatoes
Bombay bataka - Tamarind, tomato and potato curry
Vagareli makai - Spicy sweetcorn
Chicken Tandoori/ Tikka type thing
Minty yoghurt dip

Some words on the menu - all of the above I've cooked many times before, except the Bombay bataka - but looking at the recipe, I already know it is going to be fabulous. The Sukhu bataka, Lila dhania baath and Vagareli makai I have taken to dinner parties and lunch parties to great acclaim- and provided you warn people that peanuts are present, then you shouldn't have any trips to A&E either! (Did peanut allergy even exist when we were growing up?!)
Don't worry about the amount of chillies through these dishes - particularly with the masala - I promise it won't blow your head off. ( I think the one to be careful of generally is commercial dried chilli powders as they can be very harsh without much depth of flavour) - always better to make fresh.

I'm going to cook these one at a time - it isn't an efficient use of time, but I find it more enjoyable and the completed dishes do well in a warming oven - I've eaten all the above cold as well and its perfect. It also enables me to set out each mise en place and photograph them for this blog!
That said, the rice I always do last.

So, just before we commence, there is one other vaguely time consuming thing to do - make the tamarind water. You can buy this easily in supermarkets but it is equally easy to do at home. Tamarind is widely available in dried blocks. I've carved off about 30g worth, which you place in a bowl with 250ml boiling water. Leave for 10 or so mins - don't think it matters too much - I didn't get back to mine for 20 mins - and pulp the block with your fingers in the water until thoroughly broken up - the water will turn satisfyingly dark brown. Parse through a fine sieve into a container and set aside.
Take the chicken out of the fridge to reach room termperature.

You should now have:
1) Chicken in marinade coming up to room temp.
2)  a good quantity of masala paste in a bowl
3) A glass of Tamarind water.


We are now ready to set up each mise en place and prepare the dishes. Be warned - with the masala made, these dishes mostly complete in minutes so put your mise en place in order and make sure you have necessary spoons, spatulas, lids, kettle boiled etc ready before you commence!

Lets start with the Sweetcorn ~ Vagareli Makai ~ From Prashad - Indian Vegetarian Cooking by Kaushy Patel.

Prepare the mise en place:
  • Sweetcorn- I'm using 4 drained tins of the Green Giant Niblet small tins here (they usually come in the supermarket in 3 packs). I daresay you could use the low salt, low sugar varieties etc but frankly...I don't.
  • 100g Peanuts - roughly chopped. These are supposed to be monkey nuts that you shell, together with the brown skins. In the event however, I didn't have enough, so provided you use natural unsalted, un-roasted peanuts you should be OK.
  • A bowl of chopped fresh coriander. Stalks and all. Make sure at the stalk end you are chopping in the millimetres - you can relax a bit towards the leaf end!
  • Brown mustard seeds - a good 2 tsps
  • Sesame seeds - 2-3 tsps
  • Asafoetida - 1/2 a tsp
  • Circa 100ml Sunflower oil and your tub of powdered turmeric completes the mise en place 
 Ready......?

Here's the method - and it's fast.
  1. Get a nice heavy saute pan, place on full heat. Pour the oil in and leave for 30 secs to a minute. (PS - should be obvious but make sure your pan is dry with no water around!)
  2. Carefully add the mustard seeds and shake the pan around so they are evenly spread across the base of the pan
  3. When the mustard seeds start to "pop", turn the heat down to low, ensure the pan is comfortably accessible without a stretch, and carefully tip in the sweetcorn and asafoetida. NOTE, however well you have drained the sweetcorn, there is going to be water in it which will spit when it hits the hot oil. Tip the bowl of sweetcorn away from you into the pan - you can wear gloves if you like too. Stir well, then kick the heat back up and fry for a minute or so
  4. Now add a good tablespoon of your prepared masala and stir in well. Then add about 1/2 teaspoon ground turmeric, 1tsp salt and stir that in too, along with the peanuts, coriander and sesame seeds. Make sure it is all mixed well together, then reduce the heat to medium. Cook for 2-3 minutes, shaking the pan every so often, and then remove from heat, cover with the pan lid and set aside on a mat.  

You should have something that looks like the above - leave to the side. When you get your warming oven going, (at no more than about 70 degrees) - then place the pan (or decant into a serving bowl) and keep warm with the rest of the dishes.
Note, if you are consuming this straight away without the other dishes, then leave covered for 5-10 mins to let the flavours infuse before serving.

This dish has been successful with all recipients and with good reason - it's superb. What is even better is that if you have pre-made your masala (see previous post) and frozen it, then all you need to do is add the garlic to the masala (whichever method you use - mortar, garlic twist etc, this should still only take 5 mins at most), - and then just add up the times above - you can have this dish done in less than 10 mins and ready to eat within 20 minutes tops.
It also seems to go with everything too - although again - don't forget to warn people about the peanuts.
I haven't tried it yet, but you could of course do this with any plain unroasted and unsalted nuts if peanuts are a problem.
Cold, it would work well incorporated into a summer salad, or you could incorporate things into it cold - such as broken up pancetta, a can of tuna (in oil not brine) etc. Have a play!

Onwards to part 3.....

A mini banquet.....Part 1

Part 1 - the day before:

So, to start off, having made a fair amount of masala, its time to make some dishes, courtesy of and/or based on Prashad Indian Vegetarian Cooking by Kaushy Patel and Great Curries by The Hairy Bikers - Si King and Dave Myers.

Here's the menu - to be served all at once -

Lila dhania baath - Green Coriander Rice
Sukhu bataka - Spicy Picnic Potatoes
Bombay bataka - Tamarind, tomato and potato curry
Vagareli makai - Spicy sweetcorn
Chicken Tandoori/ Tikka type thing
Minty yoghurt dip

I made all the basic masala in advance (see previous post) but there is one other element to do in advance - marinating the chicken. (You can do it all on the same day - say marinate at 9am for serving in the evening - but it is much better to marinate overnight in the fridge)

So, first of all then, make the marinade.
You will need:
Green cardamom seeds - from about 15 to 20 pods dependend on size, but should equate to about a tablespoon of seeds
Coriander seeds - 2tsp
Cumin seeds - 2tsp
6 cm piece of cinnamon quill, broken up into pieces
10 cloves
3 or 4 Kashmiri Dried chillies - ripped up into pieces but retaining the seeds

Take a heavy saute pan, dry heat for a minute or so an tip all the above into the pan to roast off. Keep an eye out, shake around a bit and above all, make sure nothing burns! When you can smell the spices easily and they have released their oils, tip the lot into a mortar.
Grind the whole lot up into a powder, tip into a large bowl,  and add some grated nutmeg (I used about a third of a normal sized nutmeg), some cayenne pepper, paprika and turmeric, 3 cloves of garlic and 3cm root ginger - both pulped. I used my Garlic Twist for this (see getting started sections)
to this add about 4-5 tablespoons of natural yoghurt - I use Yeo Valley Natural Organic full fat, and mix up well.
Take your chicken - I used 4 skinnless supremes from a local award winning butcher - Chapmans - and carve up into decent sized chunks. Place in the marinade, mix together, cover with clingfilm and put in the fridge overnight.

ripped up dried kashmiri chillies
 Ground up whole spices
 Adding turmeric, ginger & garlic (and a bit of cayenne & paprika)

...and now the yoghurt - mix and add the chicken

Saturday 24 August 2013

Making the Masala

As you peruse your cookbooks - and particularly the Prashad one, you will see that a great deal of dishes incorpoate a masala.
A masala generally consists of mixes of the following: Green chillies (seeds and membranes left in), Garlic, Ginger, Salt. They can also include other ingredients such as fresh coriander.

They are always ground up into a smooth pulp ready to incorporate in your dishes. Please note, for those that aren't great lovers of big heat, my wife has yet to complain about the fresh masalas - it appears her problems lies with dried chilli powders instead.

Given that so many dishes contain this masala, I tend to look at all the recipes I am going to make, then double/ treble etc the amount I am going to need to cover all the dishes.

But today, in prep for tomorrow, I'm just making a good amount in case I need it.....which inevitably I will.

So, onto my ingredients:

For each dish, I'm currently using 3-4 medium green chillies and 1-2 hot green chillies. If cooking for the family, I am currently removing the seeds but really they should be left in.
Chop finely - looking for approx 2mmx2mm cubes here
Garlic - I'm addicted to this stuff so I tend to have about 3-4 large cloves or 5-8 smaller ones. - chop roughly
If ginger is called for - about a 3cm piece - chopped as per chilli
You will also need a good ol "pinch" of coarse salt. - if you have ever watched a cooking programme, you will undoubtedly have been amused about what chefs call a "pinch" of salt. In this case, its effectively a desert spoon.

Place your chopped ingredients in the mortar - small amounts at a time if necessary, dependent on the size of your...umm....equipment.

Pulp the lot down to a smooth paste and set aside.- (chill in fridge if like me you will be using tomorrow morning). It does freeze, but better not with the Garlic - add that fresh later.

(You can, of course, always use a food processor for the above - those attachments for the stick blenders work well too)


Friday 23 August 2013

A very fast Thai Pork Laab to start......

I was first introduced to this dish by some great friends, Chris & Ar, and was lucky enough to be standing next to the chef. As a result, I ate most of the dish straight from the pan and have loved it ever since.
The original was made with a Laab-Namtok seasoning mix manufactured by Lobo in Thailand and readily available online and in Thai stores in the UK. Its great, but unfortunately it contains MSG which my wife cannot handle without developing headaches, so I've developed my own dried seasoning instead.
Herewith the lesson according to David.......no longer authentic Thai but tasty all the same!

You will need.....
500g min pack Pork mince (I daresay it would work with chicken/ turkey mince also as a laab)
Lime juice - available in big bottle in Thai stores and little bottles in supermarkets - you will need 8 tbsp
Fresh limes - x4
Baby gem lettuce hearts
Fresh Chillies - hot - say about 2 or 3 but to taste
Fresh Coriander - 2 handfuls, including stalks (very finely chopped indeed and discard the very tail end of stalk)
Fresh Mint / Fresh Thai peppermint - big 'ol handful, leaves off the stalks and finely chopped
Palm Sugar - about 1 tbsp to start and then later to taste
Lemon Grass - 3 stalks - very finely sliced after removing the outer hard leaves
Red Onion - 1 large or 2 small-medium - sliced NOT chopped
Light Soy Sauce - about 2 splashes  - if using Kikkoman bottles then its two tips
Garlic - I like about 4 cloves of medium size - crushed 
Ginger/ Galangal - 4cm section, peeled and very finely chopped or pulped
Spring onion - x3 - chopped quite finely on the diagonal
Nam Pla/ Fish Sauce - 3 tbsp + to taste
Dried Chilli Flakes - 1 tbsp
Coriander Seeds - 1tbsp
Garlic powder = 1 tsp
Salt - 1/2 tsp

Method...
1. Marinate the minced pork packet with about 2 tbsp bottled lime juice (you can use fresh if you prefer)
2. Prepare the dried ingredients mix. Place Dried Chilli flakes, coriander seeds, garlic powder and salt in mortar and grind to fine powder. Set aside.
3. Heat a wide heavy based saute pan (see photo) with a very small dash of sunflower/ Rape seed oil on a medium to high heat and fry off the pork until all the same colour - stir and flip regularly
4. Drain all the fat off the pork - preferably through a sieve and then return to pan on medium heat with 2 splashes lime juice, the garlic, lemon grass and the ginger/ galangal
5. After about 1 min, add the red onion and reduce heat to medium
6. Allow the onion to soften (about 2-3 mins) then add the dried seasoning and mix in well
7. Add in order......Soy, Nam Pla, Palm sugar and fresh chillies, continue to fry for 2 mins
8. Add Chopped Coriander and mint and stir to merge
9. Add Sliced spring onion & stir

Now just keep tasting as the flavours develop. I'd keep on hand the following: Nam Pla, Soy, Palm Sugar, fresh chillies.

10. Place lid on pan and leave to rest for about 5 mins whilst you finish off the lettuce hearts and perhaps rice.
11. Spoon the laab into the lettuce hearts and enjoy, with freshly squeezed lime halves over. (Limes give up more juice if they are rolled firmly on the counter. They give up even more if you put them in the microwave for 10 seconds.)


PS...there is another variation on the method here:
Place the garlic, chillies, ginger/ galangal, lemon grass and fish sauce in the big Mortar and pound away - then add all as one lot. Do the pounding of the garlic, chillies, galangal and lemon grass first, BEFORE you then add the fish sauce! 


Getting started - Ingredients - Dried/ stock

OK - the more complex one. I'll try and make it by priority:

Spices
As a general rule, I like to buy whole spices and grind them myself (couple of exceptions such as ground ginger, turmeric, paprika.......and the garlic and onion granules that Krista uses sometimes!)
But whether or not you follow my route or your own, you WILL need the following to re-create the recipes I shall be posting.

Whole spices and other dried ingredients

  • Coriander seeds (dhania) - for use whole, crushed and ground
  • Cumin seeds (jeera) - for use whole and ground. I have both the more common green/ brown variety but also the slightly sweeter and smaller black (kala jeera) variety
  • Green Cardamom pods - you will use a lot of these
  • Black Cardamom pods - less used but still important for e.g. Mussaman curries, garam masala etc
  • Asafoetida/ Asafetida (hing) - you won't like the smell of this, but you'll miss it if it isn't in your food - bit like Nam pla/ fish sauce!
  • Indian Bay Leaves (tej patta)
  • Carom seeds (ajmo, ajwain or ajowan)
  • Dried chillies - come in a multitude of varieties. Try to get a mix of heats - Mild Kashmiri, Extra hot, hot, medium etc
  • Cinnamon (taaj/ dalchini) - I use this in bark form but also the more widely available "quills" from Western supermarkets (although I don't get my quills from Western supermarkets either!). The coarse bark sticks can be added to dishes whole and removed prior to serving; quills are generally roasted, ground and effectively become ground cinnamon
  • Cloves (lerving/ laung)
  • Curry leaves - great to get fresh but more likely dried
  • Fenugreek (methi)  - generally available as seeds/ crushed spice
  • Fennel seeds (soonf)
  • Mace (javantry) - a.k.a blade mace - the outside of a nutmeg basically
  • Nutmegs whole
  • Dried red peppers (Fa-Chiu)
  • Dried Pimento
  • Mustard seeds (rai) - I mainly use brown but also have black and yellow
  • Black peppercorns
  • Black/ Rock salt (kala namak)  - different flavour to sea salt
  • Star Anise (Badian Sternanis)
  • Monkey nuts (natural peanuts in brown skin, unsalted/ unroasted)
  • Tamarind block (imli) - available in blocks, requires soaking in warm water and then mashing with fingers through a sieve to make tamarind water.
  • Palm sugar/ Jaggery - Cane sugar/ Soft demerara sugar. Buy Palm sugar in solid block and use cheese grater to convert into more manageable ingredient!
  • Basmati & jasmine rice
  • Cornflour/ Arrowroot (I prefer ground arrowroot as leaves no taste)
  • Sesame seeds - white and black
  • Split red lentils (masoor dhal)
  • Yellow split mung beans (mung dhal)
  • Nigella (Black Onion) seeds
the list isn't exhaustive but should definitely get you going........when combined with the ground ingredients next on the list! (Note this is smaller as I grind the above when required!)

  • Ground turmeric (haldi) - you will use vastly more of this than you think!
  • Ground ginger (adhu)
  • Ground Smoked Paprika
  • Ground Paprika
  • Ground Medium Chilli powder
  • Ground Cayenne Chilli powder
  • Saffron......and.....
  • Garam masala
Garam masala  - completely essential in so many dishes, and, whilst available commercially in the supermarket ready made - so easy to make your own blend, experiment and put your own stamp on your flavours! Almost every family has their own blend and most of them are trade secrets! One of my favourite sources (more on these in subsequent post) is Prashad - Indian Vegetarian Cooking by Kaushy Patel - who bakes her spices for 3 days before stone milling them! (she doesn't mention exactly which spices she uses either!)

GARAM MASALA
I'm going to give you some guidelines though, and share my current blend (I'll repost when I change it again!)
So  - core ingredients that many sign up to:
Cinnamon; coriander, cardamom, cloves, cumin, nutmeg and peppercorns
to which can often be added......bay leaves, turmeric, ginger and mace.

I looked at a popular brand found in the supermarket the other day and they add.....allspice, "chilli powder" - comprising chilli pepper, cumin, oregano, garlic powder and salt; plus more cayenne chilli pepper. I've tasted it and I'm not a fan.

Here then, my current blend and method. It will keep once ground in airtight container for about a month so don't make too much!

1. Assemble your whole spices to be roasted off, comprising:
2 tbsp Coriander seeds, 2 tbsp cumin seeds, 1 tbsp black peppercorns, 2 tbsp green cardamom pod seeds (dependent on the size of your pods this can be up to 40 pods so allow time!), 1tbsp black cardamom pod seeds, 2x 6cm Cinnamon quills, broken into smaller pieces, 1 tsp cassia chips (if you have them - they are cinnamon bark chips), 1 tsp cloves, then half a teaspoon each of the following; - brown mustard seeds, nigella seeds, fennel seeds, carom seeds. Finally 2 indian bay leaves (rip them up and remove the central spine) and 8 curry leaves.
2. Heat a heavy pan for 90 secs and tip the above in. move about regularly until the oils are released and the aromas permeate your kitchen, but be careful not to let anything burn! As a rough guide, should be about 2 mins in total. A good guide is the colour of the cumin seeds - don't let them go past medium brown!
3. Tip the whole lot into a bowl, then transfer in manageable quanitities to the mortar to be ground into a fine powder. move each ground portion into a separate but reasonably sized bowl to make room for the next installment. Continue until you have ground all the whole spices and they are in the bowl.
4. Add the following:
Half a ground nutmeg, half a teaspoon ground turmeric, half a teaspoon ground ginger, half a teaspoon of ground black rock salt (or seasalt) and Quarter of a teaspoon of ground medium chilli powder.
5. Mix vigourously and decant to airtight container. Use as directed in recipes.

OK - maybe a but of a faff, but I like this current mix at the moment - although I will be trying it very soon with the "bake for 3 days" method!

By the way, the addition of some of the more unusual ingredients such as Carom seeds and black cardamom seeds are present to see if they make more "indigestible" dishes less "flatulence-producing" when consumed!

One thing - when you open the airtight jar and take a good sniff, it should smell wonderfully fresh and aromatic - you should NOT collapse on the floor wheezing and coughing! :-)

OK then - that's sort of it. We should now have a kitchen ready to go and before I commence with the recipes, I need to have one more post which recognises all the input from the professionals and suppliers that have made my cooking a success.
This post  - which I will title "Sources" - should give you all the direction you need to follow my footsteps

Have fun!


Getting started - Ingredients - Fresh

Final getting started bits then: what you need in the cupboard......

I am going to split this into 2 sections: fresh and dried ingredients - and will do fresh first as its easier!

Fresh ingredients

Contenders for the fridge:
Fresh Coriander
Root ginger/ galangal
Mint/ Peppermint
Lemon grass
Limes/ Lemons
Basil/ Thai Basil
Chillies/ Peppers
Onions/ Shallots/ Garlic
Celery/ Carrots
Fresh tomatoes - both "normal" and "cherry" great to have in hand
Potatoes - "Waxy" varieties best for Eastern cuisine

Natural Yoghurt
Double Cream/ Creme Fraiche
Butter - for making Ghee ideally or just mix with Sunflower oil

It goes without saying that fresh is always best - vegetables, herbs, meat, fish - the lot!
There are however some things which can be frozen for limited period:
Root Ginger:
If shopping at the supermarket, make sure you remove the box on the shelf and see if there is one behind it - you will get a proper piece of ginger rather than a bunch of broken off nodules. (PS, Oriental/ Indian etc stores have much better stuff if you happen to be near one)
So, having acquired a nice palm-sized piece of root ginger, your recipe calls for say, 4cm or peeled chopped ginger. When are you going to use the rest?!
Well, Peel the whole lot, then carve up into rectangles, followed by slices - they should ideally be about 1-2cm wide, up to 4cm long and no more than 1mm thick. Place in ziplock and freeze. This also works for Thai ginger/ Galangal, Fresh turmeric, lemon grass, and similar root type or "woody"/ dense type produce.
According to some friends of mine, you can also do this with your Masala paste (Chillies, Garlic, salt and sometimes ginger.......) BUT.....omit the Garlic which apparently doesn't do as well in the freezer, and add it once you have defrosted the rest of the paste.
As mentioned above, you can freeze chillies, although I wouldn't freeze them whole. Finely dice then paste them and freeze. Alternatively you can dry whole chillies - effectively dessicate them, and then grind them up into the dry spice mix. So far, this seems to be working well for me. I've dessicated them in the fridge and dried them in a warm oven - with not much difference I can discern (Seal them in airtight containers afterwards!).

For all these fabulous ingredients - do a location search and see if you have a specialist store anywhere near you. If not, ask your friends and colleagues whether they do.
Alternatively, get the stuff delivered. It will be inifinitely superior to supermarket stuff. You can also grow a fair bit over the spring/ summer: Coriander works well in the UK, but be careful - it seems to "bolt" (seed) with little provocation (too dry, too wet, sudden temperature shocks, invasion by aliens etc), which renders it useless for cooking. Chillies etc can also work well, particularly if started indoors early in the year, although I've found that UK home grown chillies seem to have heat, but little depth of flavour.

Near me I have recently discovered a gold mine in the shape of a Thai Food Direct store http://thaifooddirect.co.uk/ - have to say the quality of produce there is great - as is the variety - you can really wow the guests for instance by serving your dishes on fresh banana leaves with genuine Thai basil, Thai aubergines, proper lemon grass, and some seriously powerful chillies! They also have a great range of dried shrimp etc for the all important Thai curry pastes as well as all the pre-made stuff, massive frozen prawns, frogs legs and so on!

PS...A final word of warning....don't ever go to any of these stores hungry!

Getting started - crushing things!

OK - its nigh on impossible to create decent Indian or other Eastern/ Oriental cuisine without some crushing, pounding and general wrist-work for both dry and wet ingredients.

I used to do all my spice blending with a "magic bullet" coffee grinder (dry stuff) and a food processor (wet) - and to be fair, both seemed to be doing a good job. That said, rumours circulated of coffee grinders "burning" whole spices and ruining the flavour. in fact, if anyone watched Rick Stein's latest foray into the Eastern World he was also told the same thing.

Coinicdentally rather recently, having ground electronically a fair amount of Coriander and Cumin seeds, I was vaguely disturbed to see smoke rising from either the motor or spices or both!
Henceforth therefore, I am now a convert to the good 'ol Pestle and Mortar. In fact, I now have three - and there is good reason for this:

Firstly a nice small ceramic one for small jobs - (many recipes call for a later infusion of ground coriander, cumin, asafoetida (hing) and so on) - and as the majority of my spices are all whole, I need to often get hold of 2tsp type quantities of spice.

Next - some granite. Big, heavy and invaluable for both wet and dry grinding. This should be your first purchase as it is capable of fulfilling all requirements.

Finally - and in no small part due to watching TV, a recent addition to the armoury of crucibles - a deep clay pot with a big wooden pestle. Still getting to grips with it but absolutely fantastic for pulping ingredients containing moisture without getting chilli juice in your eye!


Above is the current stable of mortars - but you might also notice a blue plastic item.....This little beauty I believe to be one of the best kitchen gadgets I have ever purchased, and has been with me since the Good Food Show about a decade ago......its called the GarlicTwist and is made by those clever people at Nextrend again.

Trust me - this will do garlic, chilli, ginger, galangal, horseradish and much more (see the link below) - and I recommend everyone has one or two in their kitchen. Even if you just use it for garlic, you will be happy with your investment the first time you DON'T have to start digging around in the traditional UK garlic press for all the dry bits you didn't get out last time!

3rd Gen Garlic Twist by Nextrend

BTW, the best way to purchase the Garlic Twist is via Amazon - beware of imitations!

Back to the granite Mortar.....once purchased you need to "season" them. Not as hard as it sounds and you should only need do it once, but you do need to get rid of the microscopic granules of stone (although its unlikely to kill you!)
Current methodology, and what I did, is to use raw rice. Put a little in, grind it up (no bashing, use a high pressure circular grinding motion with the pestle in one spot - once you have started breaking up the ingredients you can always go to a circular motion around the crucible) - tip onto some white paper, and you will notice that the gound ingredients are grey.
Rinse out the Mortar, dry, and start again, tipping each set of ground rice onto the same paper. Keep doing this until the rice turns out white. You are now ready for use.

As for maintenance, I tend to rinse and wipe out the mortar immediately I have ground anything as stone will take on flavours and so on. Try not to use detergent or minimal amounts only and rinse well.

NEVER put ground turmeric in your mortar - this should be added to the nice stainless steel bowl you have for your mise en place and mixed then with the contents of the mortar! (I'd recommend a similar strategy for anything else with high staining propensities such as Paprika - in fact anything you have purchased which is pre-ground!)

Enjoy grinding - and remember - patience is the key - don't scrimp because your arms are tired - you will end up with a less than enjoyable whole spice stuck in your teeth later on.

PS: Masala pastes (generally green chilli, Garlic, Salt and sometimes ginger) are ideally suited to the granite mortar. Chop particularly the chilli and ginger into small pieces to cut down on time grinding. Now that I have the bigger clay mortar, if making a Masala without ginger, then I will be using this.

PPS: The heavy granite pestle is absolutely ideal for "popping" cardamom pods on the chopping board with no effort.

Getting started - other useful stuff...

Onto other stuff then.....
I'm not going to go into all the paraphernalia you need in the kitchen because you will already have most of them.....but a couple of ones to mention:
  • Sieves - multiple grades - you'll need them for rinsing pulses/ lentils/ rice etc
  • Lots of large bowls - Pyrex ones  - especially for overnight marinating
  • Lots of smaller bowls - helps with the mise en place - get everything ready to go before you start the fire - I have a bunch of small stainless steel ones which are great for this
  • Skimmers - takes impurities/ froth off the top of things like dhals - also very useful with gravy made from roasting joints of meat etc
  • Thermometer - I use a CDN digital one with a "pan hook" - but analogue sugar ones will work just as well - far more precise than that instruction to "throw a cube of bread in - it should brown in 30 secs".......which to date I have never done. You can get some pretty cheap yet accurate ones online and they are also very useful for roasts - with the long cable you can insert the probe in the meat, and still have the display unit outside the oven with the door shut!
  • Micrograters - where were we before these were invented!
  • Triple Digital Timer - very useful indeed!
  • Skewers - we've all been there, soaking the bamboo jobs in water before the BBQ......just get some very long stainless steel ones. Much easier. (That said, Nextrend Kitchen products in the States has a great "fishbone" skewer which apparently will not allow your food to spin round the skewer when you are turning it....and you can remove a piece in the middle that might be done without removing all the other pieces..gotta get me some of those!  http://nextrendproducts.com/fishbone-skewer/ )
  • Ladles - Stainless steel and Silicon (for your prized non-stick pans)
  • Tenderisers, Poultry shears, tongs and the old flat piece of steel to transfer stuff from chopping board to pan easily are all good things to have in the back pocket (if you are a tradesman wearing a utility belt of course)
  • Lots of wooden spatulars - be aware - they WILL stain with turmeric in particular, but I don't mind that. Others might though so keep one of two reserved for other cooking! 
  • Tasting spoons - you can NEVER have enough!
I am also a fan of my pinch pots for salt & pepper - I use Flaked sea salt and grind my own balck pepper in bulk (I keep the bulk airtight sealed and just transfer what I need on the day to the pinch pots) - PS, the Tesco sea salt that comes in a sort of plastic airtight "Grolsch bottle" type container.......get some of these - brilliant for your bulk holdings of salt'n'pepper but also for other whole spices which I shall come on to in another post!
Pots and Pans - again, always good to have a wide variety. I've got a complete profressional Circulon non-stick set comprising 3x frying pans, deep and wide saute pan, couple of saucepans and a stock pot; pretty much the same again in heavy stainless steel by KitchenAid, and some ad hoc saucepans, Woks, steamers, pressure cooker and so on.
Note: Circulon non-stick cookware works using circular ridges as part of their tech.....guess the clue is in the name. These are NOT suitable for dry roasting off little spices! The cumin seeds particularly get "stuck" in the ridges and are a pain to get out into the mortar. Use a completely plain stainless steel pan instead for this purpose.

Edit: I have since purchased Cast Iron Karahi/ Kadai and Carbon Steel Kadai - and seasoned them extremely well - I now use these for non-Indian cooking they are so great (and cheap too) - don't use anything else!

Nextrend Products
KitchenAid Pans
Circulon Pans
CDN Digital Thermometer @ Amazon
Triple Digital Timer on Amazon

Getting started......Knives!